|
My sled is broken, beat, and
neglected. It needs some serious TLC. As I go through it and
get it back up to snuff, I will keep the old camera on the toolbox,
and will be putting how-to pages out here. Call it "What
I did on my Fall Vacation".
Today's column will deal with
how to remove a snowmobile suspension and track. |
Years ago when I was working at the snowmobile
dealership, one of the brands had a suspension recall. This company
paid warranty based on book time, and they gave us 45 minutes
to deal with the customer, pull in the sled, pull the suspension,
tear it down, replace the shafts and bolts, reassemble it into
the sled, tension and align the track, fill out the warranty
form, wheel the sled out, and deal with the customer again. How
nice and generous of them.
As a result, I learned how to do the job
pretty fast, and a few tricks along the way. Most people don't
want to know what goes on under the seat, and it just doesn't
need to be that way. Pulling your suspension is something that
should be a 10-15 minute job in a reasonably equipped shop. Getting
it back in takes a little longer, but that is a different day's
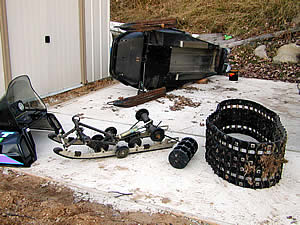
column.In my case, I am pulling out the suspension to service
the wheel bearings and the shafts as a normal part of fall maintenance
and to pull the damaged drive axle. As a result, the first thing
I did was loosen the track adjusters and remove the back axle,
wheels and all. I will be servicing that anyway, and it makes
pulling the skid frame easier. You can get the frame out with
the back axle moved all of the way up, there is just less room
and more wrestling.
|
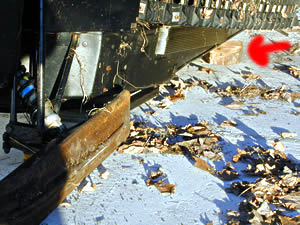
So after I pulled the back axle and
springs, and impacted the 4 shaft bolts out, I tip the sled up
on it's side, using a block of wood under the running board to
support the back of the sled. Grab the far handlebar, put a foot
on the running board, and give it good tug. Once it is resting
on the block and the ski, it is actually amazingly stable. The
red arrow points to a block of wood holding up the running board. |
 |
|
Once the sled is up on it's side and well
supported, you will want to check for coolant, gas or oil leaking
out of anywhere and deal with that. On electric start models
you should pull the battery first. The acid is a real mess if
you don't.
Once you get the sled on it's side again,
swing the suspension out so that all 4 arms clear. |
 |
|
At this point you should be able to slide
the frame forward and lift the back of it right out. For those
that insist on leaving the back wheels on, this is where you
wrestle them past the nubs on the track. |
 |
|
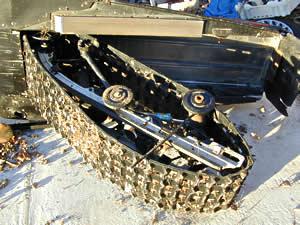
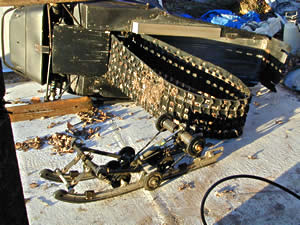
After a little wrestling, you should have
the skid frame out and ready to service. |
 |
|
On this repair, I have to go a step farther.
The chain case went into reverse at wide open throttle, and in
addition to blowing up the chain case, it twisted the drive axle
pretty bad.
Pulling this shaft and subsequently the
track is no joy, but it can be done without turning it into an
epic adventure. |
 |
|
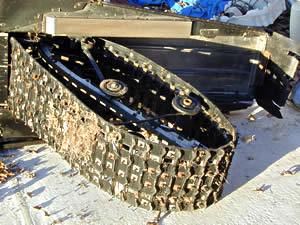
I had it sort of easy when I pulled this because
I had already pulled the chain case. The sleds that I have done
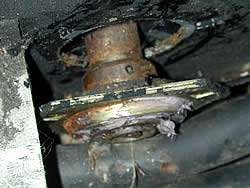
this job on varied. On this one, pulling the lower chain case
bearing looked like it would have been enough to move the shaft.
Some have a chain case side bearing with an outer eccentric clocking
collar that are a pain in the butt, like the one in the picture.
Almost all sleds have this arrangement on the clutch side where
the speedometer drive is. |
 |
These bearings can be really easy, or they
can be hopelessly siezed. Assuming the track is lose and the
Chain case side is lose, remove the speedometer drive, the outer
flange and the bolts. You can see that there is an Allen key
set screw that needs to be removed. There are actually 2 of them
about 60 degrees apart. It is best to break them lose, but they
can be drilled. That pretty much junks a $30 bearing unless you
have the ability to rethread the holes.
Once the setscrews are out, you still need
to deal with the eccentric locking collar. The collar that the
bearing is mounted on has an out of round inner bore. When rotated,
it binds against the shaft and locks the bearing in place. On
this bearing I unscrewed the set screws enough to get a pry bar
on it, held the shaft from behind, and tapped it lose. The screws
are easily replaced at any hardware store, so you can pound on
them, but be careful to thread them in far enough before you
pound or you will booger up the threads in the bearing.
I have seen a lot of these bearings that
just don't move after 10 years on the trail. In my case, the
course of action was an easy one, the shaft was junk anyway,
so I would have just cut it with a cutting torch/sawzall/cutoff
grinder. Generally you want to save as much as you can. Unfortunately,
Polaris does not have an on-line parts look up yet, but looking
up a same year ZRT shows that the shaft/wheels assembly is $222,
The bearings are $29.95 each. Like I said, save as much as you
can.
|
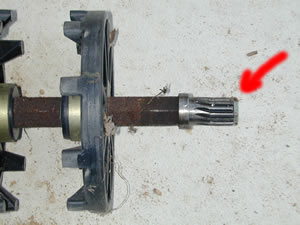
Once I had the chain case and the clutch
side bearing out, I just slid the shaft right out, and took the
track off. You might want to mark the track or take a picture
of it so you put it back on the right way.
Pulling your suspension isn't bad. A weekend
mechanic with a compressor and an impact can do this. Pulling
the track and drive shaft is a little more involved, but not
impossible by any means. It probably took me longer to do this
write-up than to get the sled to this point. |
|
Total project time at this point is about
2.5 hours, and that includes pulling the damaged chain case.
Pulling the hood wasn't part of this procedure, I did that because
of the amount of work to be done in the belly pan. That is a
different day's column..
I will be covering more topics as I work
on my neglected and well beat 95 XLT Special. I keep the camera
by the toolbox, and will catch what I think will help you. The
cool part is that for the first time in 4 years, it wasn't snowing
when I was working on this. Give it a week..
Have a good weekend, and thanks for visiting!
RJB |

